Thank you for purchasing a website template from our company. This manual will show you how to work with your template, how to edit it and make it a "live" website.

This manual includes information on the following types of templates listed in the “Templates description” section.

Templates description

  • Responsive JavaScript Animated template
  • PRO Website template
  • JavaScript Based template
  • HTML5 JS Animated template

Include several layout options – each is optimized for proper screen resolution. There are many width options included, but the major ones are for desktop, tablet and smartphones screens.

PRO Framework is a very powerful tool that has the potential to deliver on all necessary aspects of website design directly from the navigation panel and when you need it. PRO Part will allow you to quickly change and install new website sections like sliders, portfolios and images galleries, configure typography and generate page layouts, add CSS3 tricks, integrate ready-made pages, functional plugins and so much more without writing a line of code. You just have full control over the code: you only have to manipulate it the way you see fit for your website’s specific needs.

Feel free to check short PRO templates features overview video.

Is the template containing JavaScript-based elements that add dynamics of Flash-like animation still leaving the templates very light-weight. This product package includes templates with jQuery and MooTools as well as other types of elements. This is single .HTML file based template.

Is the template containing JavaScript-based elements that add dynamics of Flash-like animation still leaving the templates very light-weight. This product package includes templates with jQuery and MooTools as well as other types of elements.

Unzipping template package

  • Unzipping template package

Unzipping template package

After downloading a template package you will need to unzip it using the proper software. After unzipping a template you will see a zip archive called "sources_############.zip" that you need to unzip as well.

The sources package contains all source files for the template. The package is password protected and can be extracted only with WinZip (Windows OS) and StuffitExpander (MAC OS).

You can download both application for free using the free trial options:

While unzipping "sources_############.zip" archive you will be prompted to enter a password, which you can find at your Product Download Page (open the link in the email you received from our company).

General information and Template structure

  • Responsive JavaScript Animated template
  • PRO Website template
  • JavaScript Based template
  • HTML5 JS Animated template

Software requirements

Adobe Dreamweaver 8+ (download free trial). Used to edit the .HTML, .JS, .PHP and .CSS files

Adobe Photoshop CS+ or later (download free trial). Used to edit .psd files

Template Structure

The following scheme displays the Responsive JavaScript Animated template files structure.

  • documentation – contains template documentation;
  • css
  • images
  • js
  • template_instructions.html – open this file to view documentation on template editing and installation;
  • screenshots – contains screenshots of the template. No editable files here;
  • site – contains the .HTML, .JS, .CSS files of the template;
  • bat
  • css
  • images
  • js
  • sources – contains source files;
  • psd – contains Adobe Photoshop .psd file(s);
  • info.txt – contains information about password protected “sources” folder;
  • fonts_info.txt – contains information about the fonts used in the template.

Software requirements

Adobe Dreamweaver 8+ (download free trial). Used to edit the .HTML, .JS, .PHP and .CSS files

Adobe Photoshop CS+ or later (download free trial). Used to edit .PSD files

Template Structure

The following scheme displays the PRO Website template files structure.

  • documentation – contains template documentation;
  • css
  • images
  • js
  • template_instructions.html – open this file to view documentation on template editing and installation;
  • screenshots – contains screenshots of the template. No editable files here;
  • site – contains the .html, .js, .css files of regular template version;
  • site_pro – contains the .html, .js, .css, 404 Not Found page .psd file and video files of PRO template version;
  • sources – contains source files;
  • psd – contains Adobe Photoshop .PSD file(s);
  • info.txt – contains information about password protected “sources” folder;
  • fonts_info.txt – contains information about the fonts used in the template;

Software requirements

Adobe Dreamweaver 8+ (download free trial). Used to edit the .HTML, .JS, .PHP and .CSS files

Adobe Photoshop CS+ or later (download free trial). Used to edit .psd files

Template Structure

The following scheme displays the JavaScript Based template files structure.

  • documentation – contains template documentation;
  • css
  • images
  • js
  • template_instructions.html – open this file to view documentation on template editing and installation;
  • screenshots – contains screenshots of the template. No editable files here;
  • site – contains the .HTML file, .JS, .CSS files of the template;
  • bat
  • css
  • images
  • js
  • index.html – open this file to view the template in action;
  • sources – contains source files;
  • psd – contains Adobe Photoshop .psd file(s);
  • info.txt – contains information about password protected “sources” folder;
  • fonts_info.txt – contains information about the fonts used in the template.

Software requirements

Adobe Dreamweaver 8+ (download free trial). Used to edit the .HTML, .JS, .PHP and .CSS files

Adobe Photoshop CS+ or later (download free trial). Used to edit .psd files

Template Structure

The following scheme displays the HTML5 JS Animated template files structure.

  • documentation – contains template documentation;
  • css
  • images
  • js
  • template_instructions.html – open this file to view documentation on template editing and installation;
  • screenshots – contains screenshots of the template. No editable files here;
  • site – contains the .HTML, .JS, .CSS files of the template;
  • bat
  • css
  • images
  • js
  • sources – contains source files;
  • psd – contains Adobe Photoshop .psd file(s);
  • info.txt – contains information about password protected “sources” folder;
  • fonts_info.txt – contains information about the fonts used in the template.

Editing template

  • Editing HTML and CSS files
  • Editing PSD files
  • Working with custom fonts

Editing HTML and CSS files

Working with the template you need to edit the .html files, .css files and .psd files.

All editable HTML files are located in "site" or "site_pro" folder (in case you purchased PRO website template) of the template package (index.html, index-1.html,index-2.html, etc.) Each index-#.html file represents a single template page.

To open .html file with Adobe Dreamweaver application, you should right mouse click on the file, and in the context menu select Open with -> Adobe Dreamweaver. When the file is opened you can start editing it.

Adobe Dreamweaver is a recommended application as it allows you to edit the HTML files content in visual mode. You don't even need to work with the HTML code itself. Open any .html file and click the Design button at the top of the screen to switch to visual mode.

Note, JavaScript Based templates (single .HTML file based) can't be edited in Desing mode of Adobe Dreamweaver beacuse of their nature. You can use Code or Live Code modes.

Feel free to check the detailed text and video tutorials on how to edit HTML files with Adobe Dreamweaver

CSS files are used to change the template appearance like fonts (font-family, font-size, color etc), backgrounds, column width values etc. You can edit the css files with Adobe Dreamweaver application. Detailed tutorials on how to work with the CSS files are available at our online help center.

Editing PSD files

PSD files are located in the "sources/psd" folder in your template package. PSD are the source files of the template design. They are divided into layers so any part of the template design can be changed.

During the customization process you can refer to the PSD files in order to change the images used in the content pages or in the design.

You can learn more about working with photoshop checking the detailed tutorials

Working with custom fonts

Some templates may contain the non-default fonts used in the design. Be default the internet browser can render only fonts that are installed to your operating system. In other words if your website design uses some custom fonts and these custom fonts are not installed on your website visitor's computer, custom fonts won't be displayed. Default fonts will be rendered instead. That's why web developers should look for some alternative solutions. In our templates custom fonts can be embedded using two techniques: Cufon Java Script fonts and Google Web Fonts.

Cufon Java Script fonts

Cufon generated fonts are created using Java Script. By default the cufon fonts support only Latin characters. If you want to use custom fonts with your language characters please check the tutorial on how to work with cufon generated fonts.

Google Web Fonts

Custom fonts can also be embedded into the HTML page using the Google Web Fonts service. You can learn more checking the tutorial on how to work with Google web Fonts.

Working with plugins

  • Demos
  • Contact Form
  • Just Slider
  • Gallery
  • Search form
  • Countdown
  • Subscribe Form

Contact Form manual

Contact Form gives visitors the opportunity to send messages to the site-owner. The contact data (Name, Email, Text message) is submitted into the corresponding fields. It can be very beneficial if the visitor does not have an Email Client installed or uses someone else's computer (e.g. in the internet club). For this reason we have developed the universal contact form that sends messages to the email specified by the site owner, has the expandable number of fields and transmissible data verification feature.

Note, contact form is enabled, configured and works by default. These steps are required if you are trying to use this contact form in another project/template without working contact form.

To make the form send the emails to a desired email address you need to:

  1. Insert target email instead of '#' symbol in the header part of .html file with the contact form - in case you have Responsive JS Animated website template or HTML 5 JS Animated template
  2. Insert target email instead of '#' symbol in the end of "js/forms.js" file - in case you have Responsive PRO website template or Full JavaScript Animated template
  3. Please check "JS Animated. How to activate contact form" and "JS Animated. Contact form: possible issues and solutions" tutorials in case you still can't make your contact form work.

Description

The HTML structure inside the form is flexible, the only condition is that all the fields (input, textarea HTML elements) should be placed inside the label tags that have class corresponding to their type.

There are following classes/types by default:

  • name – the User's Name. Validation: digits are disallowed, not less than 2 symbols;
  • email – the User's Email;
  • state – Country (Area). Validation: digits are disallowed, not less than 2 symbols;
  • phone – Phone. Validation: digits only, not less than 5 symbols. Additional acceptable not alphabetical symbols: "space", "+" and "-";
  • fax – Fax. Validation: digits only, not less than 5 symbols. Additional acceptable not alphabetical symbols: "space", "+" and "-";
  • message – Message. Validation: any symbols, not less than 20 symbols.
  • notRequired – This class is used as a pointer for the optional fields while filling the forms out.
The Code:

<label class="name">
  <input type="text" value="Enter Name:">
</label>
<label class="email">
   <input type="email" value="Enter Email:">
</label>
<label class="state notRequired">
   <input type="text" value="Enter Your State:">
</label>
<label class="phone">
   <input type="tel" value="Enter Phone:">
</label>
<label class="fax">
   <input type="tel" value="Enter Fax:">
</label>
<label class="message">
   <textarea>Enter Message:</textarea>
</label>
					

Also label tag mentioned above can contain nested span elements with classes error and empty, which include the error message in case the data in the field is specified incorrectly or the field is just empty.

The Code:

<label class="name">
   <input type="text" value="Enter Name:">
   <span class="error">*This is not a valid name.</span> <span class="empty">*This field is required.</span>
</label>
<label class="email">
   <input type="email" value="Enter Email:">
   <span class="error">*This is not a valid email address.</span> <span class="empty">*This field is required.</span>
</label>
<label class="state notRequired">
   <input type="text" value="Enter Your State:">
   <span class="error">*This is not a valid state name.</span> <span class="empty">*This field is required.</span>
</label>
<label class="phone">
   <input type="tel" value="Enter Phone:">
   <span class="error">*This is not a valid phone number.</span> <span class="empty">*This field is required.</span>
</label>
<label class="fax">
   <input type="tel" value="Enter Fax:">
   <span class="error">*This is not a valid fax number.</span> <span class="empty">*This field is required.</span>
</label>
<label class="message">
   <textarea>Enter Message:</textarea>
   <span class="error">*The message is too short.</span> <span class="empty">*This field is required.</span>
</label>

There is also div container with the class success inside the form, which is displayed after the message has been sent.

The Code:

<div class="success"> Contact form submitted!
<strong>We will be in touch soon.</strong> </div>


Script Initialization

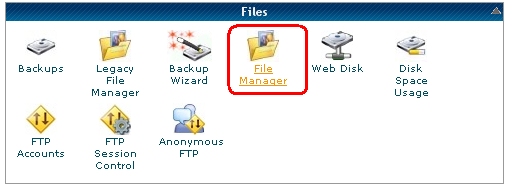
To activate the contact form you need to include contact from script in the <head> section of HTML file and copy "bat" folder to your website root folder. The "bat" folder should contain 1 file: MailHandler.php

You can find "bat" folder in the "documentation\demos" folder and the scripts mentioned below in the "documentation\demos\js" folder.

<script type="text/javascript" src="js/jquery-1.7.min.js"></script>
<script type="text/javascript" src="js/forms.js"></script>

After this you should initialize your contact form on the $(window).load() : event


<script type="text/javascript">
   $(window).load(function(){
 	   $('#form1').forms({
 	     ownerEmail:'#'
 	     })
   })
</script>
					

Use the following parameters for initialization:

  • ownerEmail – the Email address the data will be sent to;
  • successShow – the period of time in milliseconds, during which the Send Message will be shown and after which the fields will be emptied, by default it is 4000 - 4 sec.

Just Slider manual

Features:

  • the ability to create slide transition effects;
  • static/dynamic pagination;
  • transition effects for HTML slider titles/captions;
  • start/stop buttons;
  • "current/total" images counter (e.g. the 2nd of 3);
  • progressbar;

Description

Files needed to work with the slider:

  • jquery-1.7.min.js – jQuery library (the slider will work with this version of library only);
  • jquery.easing.1.3.js – easing effects needed for creating an animation;
  • tms-0.4.1.js – the slider’s functionality;
  • demo.css – the set of CSS styles for the slider stylization;
  • demo.js – slider initialization;

You can find JS files listed above in the "documentation\demos\js" folder and demo.css file in the "documentation\demos\css" folder.

The Code:

To start with please include the following files in the <head> section of HTML file:

<link rel="stylesheet" href="css/demo.css" type="text/css" media="all">
<script type="text/javascript" src="js/jquery-1.7.min.js"></script>
<script type="text/javascript" src="js/jquery.easing.1.3.js"></script>
<script type="text/javascript" src="js/tms-0.4.1.js"></script>
<script type="text/javascript" src="js/demo.js"></script>

The HTML Slider Structure:

<div class="slider">
	<ul class="items">
		<li><img src="images/slide-1.png" /></li>
		<li><img src="images/slide-2.png" /></li>
		<li><img src="images/slide-3.png" /></li>
		<li><img src="images/slide-4.png" /></li>
		<li><img src="images/slide-5.png" /></li>
	</ul>
</div>

If there are any HTML titles and navigation buttons in the slider, the HTML code will be the following:

<div class="slider">
	<ul class="items">
		<li><img src="images/slide-1.png" /><span class="banner">banner content</span></li>
		<li><img src="images/slide-2.png" /><span class="banner">banner content</span></li>
		<li><img src="images/slide-3.png" /><span class="banner">banner content</span></li>
		<li><img src="images/slide-4.png" /><span class="banner">banner content</span></li>
		<li><img src="images/slide-5.png" /><span class="banner">banner content</span></li>
	</ul>
</div>
<a href="#" class="prev">prev</a> <a href="#" class="play">play</a> <a href="#" class="next">next</a>

The core styles are located in demo.css file. The most important requirement for the slider stylization is the following CSS rule - .items {display:none;} - do not change it. All other attributes are editable.

Initialization

slider initialization is set in demo.js file:

$(document).ready(function(){
	$('.slider')._TMS({
		show:0,
		pauseOnHover:false,
		prevBu:'.prev',
		nextBu:'.next',
		playBu:'.play',
		duration:1100,
		preset:'fadeThree',
		pagination:true,//'.pagination',true,'<ul></ul>'
		pagNums: false ,
		slideshow:7000,
		numStatus:true,
		banners:false,// fromLeft, fromRight, fromTop, fromBottom
		waitBannerAnimation:false,
		progressBar:'<div class="progbar"></div>'
	})		
 })							

The initialization occurs on the event $(document).ready(). Parameters:

  • preset – the preset that will be used. All presets are located in tms-0.4.x.js;
  • duration – the animation time in milliseconds;
  • pagination – the pagination, there are three possible values:
    • (true/false, by default false) - use/do not use the pagination;
    • css path to the sepately created pagination, f.e. ".pags";
    • pagination HTML code, f.e. "<ul><li><a href="#"></a></li></ul>", it will be added to the block div;
  • pagNums – possible values - true/false - sets images numbers in order;
  • numStatus – possible values - true/false - creates the counter in the slider;
  • playBu, nextBu, prevBu – set the css class for the buttons which turn the slideshow on/off, switch the last/next image;
  • slideshow – the number of milliseconds in which one image change another, false by default;
  • progressBar – progressbar, that is displayed in the slideshow and changes its length as the pictures change one another f.e. '<div class="progbar"></div>', corresponding CSS styles should be created for this class;
  • banners – possible values:
    • true/false - turn banners on/off;
    • fade, fromLeft, fromRight, fromTop, fromBottom - the ready-made presets to display the banners;
  • pauseOnHover – possible values - true/false - as soon the cursor is put over the slider area the animation stops;
  • waitBannerAnimation – possible values - true/false - the feature is used for simultaneous (false) or gradual (true) animation of the banner and the image;
  • show – indicates the number of the slide to start the animation from, the count starts from 0.

Gallery manual

Features:

  • the ability to create slide transition effects;
  • thumbnail pagination;
  • transition effects for HTML slider titles/captions;
  • start/stop buttons;
  • "current/total" images counter (e.g. the 2nd of 3);
  • progressbar;

Description

Files needed to work with the gallery:

  • jquery-1.7.min.js – jQuery library (the gallery will work with this version of library only);
  • jquery.easing.1.3.js – easing effects needed for creating an animation;
  • tms-0.4.1.js – the gallery’s functionality;
  • uCarousel.js – the thumbnail pagination functionality;
  • demo.css – the set of CSS styles for the gallery stylization;
  • demo.js – gallery initialization;

You can find JS files listed above in the "documentation\demos\js" folder and demo.css/demo.js files in the "documentation\demos" folder.

To start with please include the following files in the <head> section of HTML file:

<link rel="stylesheet" href="css/demo.css" type="text/css" media="all">
<script type="text/javascript" src="js/jquery-1.7.min.js"></script>
<script type="text/javascript" src="js/jquery.easing.1.3.js"></script>
<script type="text/javascript" src="js/uCarousel.js"></script>
<script type="text/javascript" src="js/tms-0.4.1.js"></script>
<script type="text/javascript" src="js/demo.js"></script>

The HTML Gallery Structure:

<div class="gallery">
	<ul class="items">
		<li><img src="images/slide-3.png" alt="" /></li>
		<li><img src="images/slide-4.png" alt="" /></li>
		<li><img src="images/slide-1.png" alt="" /></li>
		<li><img src="images/slide-2.png" alt="" /></li>
		<li><img src="images/slide-5.png" alt="" /></li>
		<li><img src="images/slide-6.png" alt="" /></li>
		<li><img src="images/slide-7.png" alt="" /></li>
	</ul>
</div>
<div class="pag">
	<div class="img-pags">
	  <ul>
		<li><a href="#"><img src="images/slide-3-thumb.jpg" alt="" /></a></li>
		<li><a href="#"><img src="images/slide-4-thumb.jpg" alt="" /></a></li>
		<li><a href="#"><img src="images/slide-1-thumb.jpg" alt="" /></a></li>
		<li><a href="#"><img src="images/slide-2-thumb.jpg" alt="" /></a></li>
		<li><a href="#"><img src="images/slide-5-thumb.jpg" alt="" /></a></li>
		<li><a href="#"><img src="images/slide-6-thumb.jpg" alt="" /></a></li>
		<li><a href="#"><img src="images/slide-7-thumb.jpg" alt="" /></a></li>
	  </ul>  
	</div>								
	<a href="#" class="button button1" data-type="prevPage"><</a>
	<a href="#" class="button button2" data-type="nextPage">></a>
</div>

If there are any HTML titles and navigation buttons in the gallery, the HTML code will be the following:

<div class="gallery">
	<ul class="items">
		<li><img src="images/slide-3.png" alt="" /><span class="banner">banner content</span></li>
		<li><img src="images/slide-4.png" alt="" /><span class="banner">banner content</span></li>
		<li><img src="images/slide-1.png" alt="" /><span class="banner">banner content</span></li>
		<li><img src="images/slide-2.png" alt="" /><span class="banner">banner content</span></li>
		<li><img src="images/slide-5.png" alt="" /><span class="banner">banner content</span></li>
		<li><img src="images/slide-6.png" alt="" /><span class="banner">banner content</span></li>
		<li><img src="images/slide-7.png" alt="" /><span class="banner">banner content</span></li>
	</ul>
</div>
<a href="#" class="prev">prev</a> <a href="#" class="play">play</a> <a href="#" class="next">next</a>
<div class="pag">
	<div class="img-pags">
	  <ul>
		<li><a href="#"><img src="images/slide-3-thumb.jpg" alt="" /></a></li>
		<li><a href="#"><img src="images/slide-4-thumb.jpg" alt="" /></a></li>
		<li><a href="#"><img src="images/slide-1-thumb.jpg" alt="" /></a></li>
		<li><a href="#"><img src="images/slide-2-thumb.jpg" alt="" /></a></li>
		<li><a href="#"><img src="images/slide-5-thumb.jpg" alt="" /></a></li>
		<li><a href="#"><img src="images/slide-6-thumb.jpg" alt="" /></a></li>
		<li><a href="#"><img src="images/slide-7-thumb.jpg" alt="" /></a></li>
	  </ul>  
	</div>								
	<a href="#" class="button button1" data-type="prevPage"><</a>
	<a href="#" class="button button2" data-type="nextPage">></a>
</div>

The core styles are located in demo.css file. The most important requirement for the gallery stylization is the following CSS rule - .items {display:none;} - do not change it. All other attributes are editable.

Initialization

gallery initialization is set in demo.js file:

$(document).ready(function(){
		$('.gallery')._TMS({
			show:0,
			pauseOnHover:true,
			prevBu:'.prev',
			nextBu:'.next',
			playBu:'.play',
			duration:10000,
			preset:'zoomer',
			pagination:$('.img-pags').uCarousel({show:4,shift:2}),
			pagNums:false,
			slideshow:7000,
			numStatus:true,
			banners:'fromRight',// fromLeft, fromRight, fromTop, fromBottom
			waitBannerAnimation:false,
			progressBar:'
' }) })

The initialization occurs on the event $(document).ready(). Parameters:

  • preset – the preset that will be used;
  • duration – the animation time in milliseconds;
  • pagination – the tumbnail pagination:
    • axis – gallery rotation axis;
    • rows – number or rows/columns;
    • show – number of visible items(depends on the rows value);
    • shift – active element left indent;
    • step – number of elements to scroll on clicking prev\next;
    • curr – initial active element;
    • clickable – make item active on click;
    • retFalse – если clickable, то делать ли retFalse или нет;
    • activeClass – carousel active class;
    • buttonClass – carousel controls buttons class;
    • blockAtEnd – start of the beginning when carousel reached end;
    • duration – animation speed;
    • easing – easing animation effect;
    • All buttons has specific class (.button by default) and data-type, that defines button behavior. At the moment you have 4 control button: prev, next(navigate through active images), prevPage, nextPage(thumbnails navigation)
  • pagNums – possible values - true/false - sets images numbers in order;
  • numStatus – possible values - true/false - creates the counter in the slider;
  • playBu, nextBu, prevBu – set the css class for the buttons which turn the slideshow on/off, switch the last/next image;
  • slideshow – the number of milliseconds in which one image change another, false by default;
  • progressBar – progressbar, that is displayed in the slideshow and changes its length as the pictures change one another f.e. '<div class="progbar"></div>', corresponding CSS styles should be created for this class;
  • banners – possible values:
    • true/false - turn banners on/off;
    • fade, fromLeft, fromRight, fromTop, fromBottom - the ready-made presets to display the banners;
  • pauseOnHover – possible values - true/false - as soon the cursor is put over the slider area the animation stops;
  • waitBannerAnimation – possible values - true/false - the feature is used for simultaneous (false) or gradual (true) animation of the banner and the image;
  • show – indicates the number of the slide to start the animation from, the count starts from 0.

Search Engine manual

Note, search form is enabled, configured and works by default. These steps are required if you are trying to use this search form in another project/template without working search form.

Note, search form is not implemented and will not work in JavaScript Based (single .HTML file based) templates.

You can find the files and folders listed below in the "documentation\demos" folder.

Description

Files needed to work with the form:

  • jquery-1.7.min.js – jQuery library (the form will work with this version of library only);
  • search.css – stylesheet file, which is being used for the search results pages stylization;
  • search.php – page, where the search results will appear;
  • search.js – script, which is responsible for the search results output in an iframe on the page search.php;
  • results.php – PHP script, which actually performs the search.

To make the form work correctly, proper parameters should be set:

<form id="search" action="search.php" method="GET" accept-charset="utf-8">
   <input type="text" name="s" />
   <a onclick="document.getElementById('search').submit()">Search</a>
</form>

In this form we should define such parameters as: action="search.php" and method="get", also set parameter for an input: name="s". If you want to change the name of the search form, which is id="search" by default, you should change it on the line 3 in the file search.js as well, you can find it in search folder.

Settings

To make the form work correctly, please, perform the following steps:

  • copy search folder to the root directory with your *.html files;
  • move file search.php from the search folder to the root directory (with *.html files);
  • edit your form, using the directions above;
  • copy partly header and footer with all the connected scripts in the section <head></head> to the page search.php, but necessarily add connection of the file search.js. For example:
    <link rel="stylesheet" href="css/reset.css" type="text/css" media="all">
    <link rel="stylesheet" href="css/fonts.css" type="text/css" media="all">
    <link rel="stylesheet" href="css/style.css" type="text/css" media="all">
    
    <script src="js/jquery-1.7.min.js"></script>
    <script src="search/search.js"></script>
                            
  • for the search results output add the following block to your content:
    
                            <h3>Search result:</h3>
    <div id="search-results"></div>
    
  • change style of the search results, using search.css.

All the rest main styles of your template will be automatically pulled from the file style.css by the PHP script.

Countdown Script Manual (Under Construction page)

Features:

  • counts time till exact date;
  • has custom skin designs.

Description

Files needed to work with the timer:

  • jquery-1.7.min.js – jQuery library (the timer will work with this version of library only);
  • jquery.countdown.min.js – the timer functionality;
  • demo.css – the set of CSS styles for the timer stylization.

You can find JS files listed above in the "documentation\demos\js" folder and demo.css file in the "documentation\demos\css\countdown" folder.

Please include the following files in the <head> section of HTML file to start working with the timer:

<link rel="stylesheet" href="css/demo.css" type="text/css" media="all">
<script type="text/javascript" src="js/jquery-1.7.1.min.js"></script>
<script type="text/javascript" src="js/jquery.countdown.min.js"></script>

The HTML Timer Structure:

<div id="counter"></div>
<div class="counter_desc">
	<div class="days">Days</div>
	<div class="hours">Hours</div>
	<div class="minutes">Minutes</div>
	<div class="seconds">Seconds</div>
</div>

Initialization

You can find code for the timer initialization in the end of the jquery.countdown.min.js file:

$(document).ready(function(){
	var _date=new Date()
		,countdown_to={
			year:2013
			,month:6 
			,date:13
			,hours:0
			,minutes:15
			,seconds:00
		}
	
	_date.setFullYear(countdown_to.year,countdown_to.month,countdown_to.date)
	_date.setHours(countdown_to.hours)
	_date.setMinutes(countdown_to.minutes)
	_date.setSeconds(countdown_to.seconds)
	
	/*code for demonstration*/
	_date=new Date()
	_date.setMonth(_date.getMonth()+8)
	/*end code for demonstration*/
		
	$('#counter').countdown({
		image: 'images/digits_inverted.png',
		startTime: _date,
		stepTime: 35
	});	
});							

The initialization occurs on the event $(document).ready().

Parameters:
  • image – shows path to the image which will be used as a skin (the directory images contains files that you can use as skins for the timer);
  • startTime – sets the final date of the countdown. Time countdown is implemented with  the help of variable _date;
  • stepTime – sets cycle rate of numbers’ animation.

The demo version shows the time that remains from the current date plus 8 months. That is why timer starts a new countdown every time you refresh the demo page. Here is a code where you can edit these parameters:

	
	/*code for demonstration*/
	_date=new Date()
	_date.setMonth(_date.getMonth()+8)
	/*end code for demonstration*/
						

If you want to set exact date, you should change variable _date. To do this you must change values for year, month(pay attention that months’ numbering starts from zero), date, hours, minutes, seconds. Here is a piece of code where you can change these parameters:

$(document).ready(function(){
	var _date=new Date()
		,countdown_to={
			year:2013
			,month:6 
			,date:13
			,hours:0
			,minutes:15
			,seconds:00
		}
});							

Also you have to delete the following code:


	/*code for demonstration*/
	_date=new Date()
	_date.setMonth(_date.getMonth()+8)
	/*end code for demonstration*/
						

Subscribe Form Manual

Features:

  • website owner receives the emails with the name and email address of his website's visitor which wants to be subscribed;
  • website visitor receives subscription success confirmation email.

Description

The HTML structure inside the form is flexible, the only condition is that inputs should be placed inside the label tags that have class corresponding to their type.

There are following classes/types by default:

  • name – the User's Name. Validation: digits are disallowed, not less than 2 symbols;
  • email – the User's Email;
The Code:

<label class="name">

  <input type="text" value="Enter Name:">

</label>

<label class="email">

   <input type="email" value="Enter Email:">

</label>


Also label tag mentioned above can contain nested span elements with class error, which include the error message in case the data in the field is specified incorrectly.

The Code:

<label class="name">

   <input type="text" value="Enter Name:">

   <span class="error">*This is not a valid name.</span>
</label>

<label class="email">

   <input type="email" value="Enter Email:">

   <span class="error">*This is not a valid email address.</span>
                    

Script Initialization

To activate the subscribe form you need to include subscribe form script in the <head> section of HTML file and copy "bat" folder to your website root folder. The "bat" folder should contain 1 file: MailHandler-sub.php

You can find "bat" folder in the "documentation\demos" folder and the scripts mentioned below in the "documentation\demos\js" folder.

<script type="text/javascript" src="js/jquery.min.js(jquery-1.8.2)"></script>

<script type="text/javascript" src="js/sForm.js"></script>

After this you should initialize your subscription form on the $(window).load() : event at the end of sForm.js file


   $(window).load(function(){

 	   $('#form1').sForm({

 	     ownerEmail:'#',

 	     sitename:'sitename.link'

 	     })

   })


Use the following parameters for initialization:

  • ownerEmail – the Email address the data will be sent to;
  • sitename – website address which maintains subscription form.

In case of successful subscription website owner and website visitor get two separate successful subscription confirmation emails. Website owner target email is grabbed from sForm.js file and website visitor email is an email specified during subscription.

Uploading template

  • Uploading template via FTP
  • Uploading template using cPanel filemanager

In order to make your site "live", you need to upload all the content of "site" or "site_pro" folder (in case you purchased PRO website template) from your local computer to your hosting server.

Please note: your website root depends on the directory structure on your hosting server. If you upload the "site" folder itself into your server, the root to your website will be http://your_domain_name/site. To avoid this and make the website root http://your_domain_name/ please open the "site" folder and upload the folder content.

This video tutorial will show you how you can upload files to your host using free FTP software FileZilla (you may use any other software you like, or upload directly via Hosting Cpanel)

Please do not upload the sources directory or any of the template source files to the hosting server.

In order to make your site "live", you need to upload all the content of "site" or "site_pro" (in case you ordered PRO template) folder from your local computer to your hosting server.

Please note: your website root depends on the directory structure on your hosting server. If you upload the "site" folder itself into your server, the root to your website will be http://your_domain_name/site. To avoid this and make the website root http://your_domain_name/ please open the "site" folder and upload the folder content.

This tutorial will show you how to upload files to a server using cPanel file manager. The uploading procedure should be the same in case your hosting provider provides cPanel (WebHost Manager, WHM). Once you are logged into your hosting control panel, locate the FileManager tool.

In case you are willing to upload your files to any sub-directory, just use the navigation tree on the left side to locate the needed folder.

Click the "Upload" button to select and upload your files.

Note, you should compress/zip your files before uploading on a server.

The file has been uploaded. Now you can unarchive (unzip) it, using the "Extract" option, built in your Hosting Control Panel.

This video tutorial will show you how you can upload files to your host using cPanel file manager.

Please do not upload the sources directory or any of the template source files to the hosting server.

Additional information

More instructions you can find by going to the following links:

JavaScript Based templates (single .HTML file based) specific tutorials:

PRO Website templates specific tutorials:

We hope this manual was useful for you and helped you to install, edit the template and to resolve your issues.

In case of any difficulties you can contact our support team via the Live Chat or send a request to our senior technicians via the Online Help Desk.